How to Create a Blog in WordPress in 2024 [Guide]
Have you ever felt daunted by the prospect of launching your own blog and earning an income from it? If so, you’ve landed in the right spot. Waste no time and delve into this guide immediately.
Embarking on the journey of blogging and establishing niche sites isn’t as daunting as it might seem. It largely hinges on the platform you opt for. Personally, I swear by WordPress.
Many bloggers prefer WordPress over other platforms for one primary reason: you don’t need to be a developer to craft a website on it. As of 2021, this platform boasts over 64 million domains.
But, What Is Blogging?
A blog, a form of website, disseminates articles, diary-style entries, or similar content to the broader public. Individuals utilize them to share personal information, and if they possess an audience capable of generating content, this aids in amplifying their impact, influence, and engagement with the material, potentially leading to monetization opportunities.
The Advantages of Blogging
Creating blogs as a profession is exactly where I aimed to be. It’s that sensation when you earn from blogging, have the flexibility to work whenever suits you, and aren’t tied to a desk? That’s totally my vibe!
The Disadvantages of Blogging
Achieving success in blogging requires consistent posting, which can pose a challenge for beginners who also work full-time.
How Do I Create a Blog on WordPress?
Now that you’ve grasped all the fundamentals, it’s time to delve into the proper way of initiating a blog.
What Do I Need to Set Up A Blog?
Do you know the essentials for launching a blog? You require time, vitality, and an intriguing subject. Alternatively, you might need passion, a source of inspiration, or simply creative momentum.

- A personal computer (PC) is indispensable; trying to set up your site on a mobile device would be cumbersome for a beginner.
- Investing some money into your venture is crucial. Consider it an investment, as you’ll likely recoup it. Your budget is vital.
WordPress – Free – (No Hidden Costs)
Hosting – Paid ($2.95/month at Bluehost)
Theme – Free or Premium( Your Choice)
Thats’ all you need!
“Too good to be true?” Let me show you how (step-by-step) and with screenshots.
There are four basic steps you need to take in order to set up on a WordPress website or blog.
- Choose Your Blog Name and Hosting
- Choose a Hosting Service Provider for Your Site
- Install WordPress
- Login to WordPress and Beautify Your Site
Choose Your Blog Name and Hosting

Take the necessary time to carefully select the name for your brand to foster a strong connection with your target audience. Consider the possibility of combining words in your domain, such as “weight” and “loss.”
If you’re embarking on a new business venture, it’s advisable to steer clear of investing in premium domains for your own benefit; it’s not essential. Opt instead for domains ending in “.com” or even “.net” rather than alternative extensions. Should you decide to explore other extensions, ensure thorough research is conducted beforehand.
Once you’ve settled on a domain name you’re satisfied with, visit Hostinger and navigate to the domains tab to verify its availability. Simply input your desired domain name and initiate the search process.
If you opt to purchase your domain through platforms like GoDaddy, you’ll need to take additional steps later to link it to your Hostinger account. Therefore, it’s more advantageous to acquire your domain name directly from Hostinger.
Choose a Hosting Service Provider for Your Site
The subsequent action involves selecting a location to house your website. Hosting serves as a virtual space for your domain on the internet, akin to renting a plot of land.
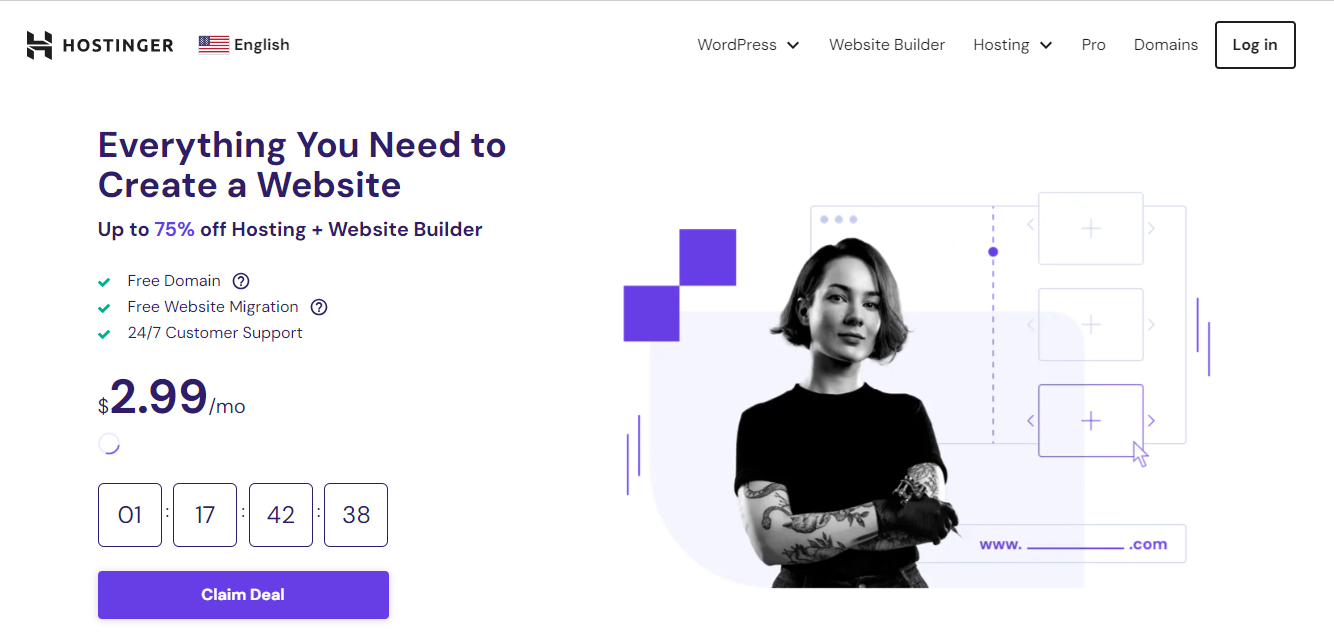
Hostinger stands as my preferred hosting provider due to its affordabilty and seamless WordPress installation process. By signing up for a Hostinger account, you gain access to a free one-click WordPress installation feature.
More Reasons Why You Should Get Your Hosting Plan at Hostinger
- Trusted by Millions
Hostinger hosts over 2 million websites, with majority being utilized by bloggers.
- Reliability
With a strong uptime guarantee and reliable servers, Hostinger ensures your blog stays online and accessible to your audience.
- User-Friendly Interface
Hostinger’s intuitive control panel makes it easy for bloggers to manage their WordPress websites without technical expertise.
- Fast Loading Speeds
Hostinger’s infrastructure is optimized for speed, helping your WordPress blog load quickly and provide a seamless user experience.
- Security Measures
Hostinger implements robust security measures to protect your WordPress blog from threats like malware and hacking attempts.
- Affordability
Hostinger offers competitive pricing plans suitable for bloggers, including budget-friendly options.
- 24/7 Customer Support
Hostinger offers round-the-clock customer support to assist bloggers with any technical issues or inquiries they may encounter.
- Scalability
As your blog grows, Hostinger offers scalable hosting solutions to accommodate increased traffic and resource requirements.
- Free Domain Name
Hostinger often provides a free domain name with their hosting plans, helping bloggers establish their online presence without extra cost.
- Money-Back Guarantee
Hostinger’s money-back guarantee allows bloggers to try their services risk-free and ensure they meet their needs and expectations.
- One-Click WordPress Installation
Hostinger, a well-regarded provider of WordPress hosting, offers an ideal solution for newcomers looking to start a blog. By opting for Hostinger , you can streamline the process of connecting your domain name with your hosting service.
This eliminates the need for navigating through the complexities and time-consuming tasks associated with coordinating multiple companies to link your domain and hosting.
- Different Packages to Choose From
When considering hosting for your WordPress blog, Hostinger offers a variety of packages to choose from. These packages cater to different needs and budgets, ensuring that you can find the perfect hosting solution for your blog.
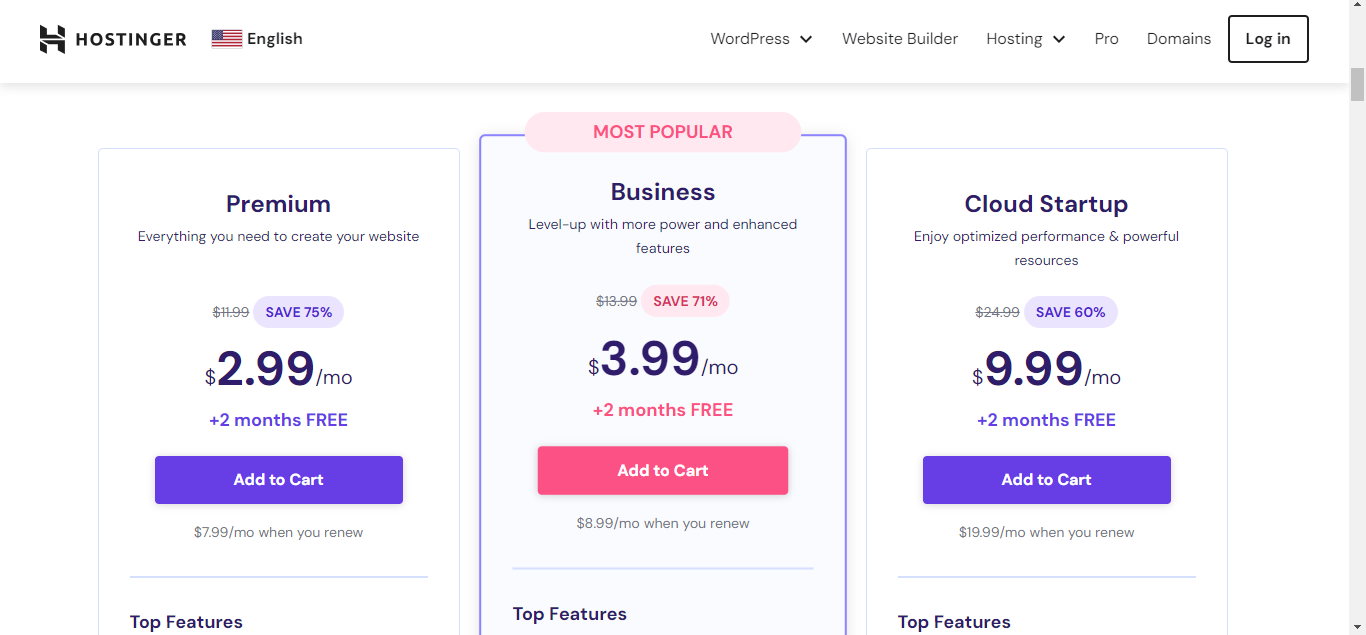
Whether you’re just starting out and need a basic plan or require more advanced features and resources, Hostinger has options to accommodate your requirements. With a range of packages available, you can select the one that best fits your blogging goals and growth trajectory.
NB: Hostinger’s enhanced cPanel is user-friendly, granting swift access to features, while maintaining robust security measures to safeguard digital information.
Now, Let Me List Out the Benefits Discussed Above:
- Free Domain name
- Free SSL Certificate
- Unlimited storage
- Unlimited bandwidth
- Host unlimited Websites (Starts with beginner-friendly package)
- Unlimited Parked Domains
You can start with a basic plan and upgrade later.
Install WordPress and Beautify Your Site
Like I said before, Hostinger’ one-click” installer will set up WordPress for you, so head on to Hostinger and Sign up for your hosting plan.
It’s all taken care of in your Hostinger registration.
Once you click select your prefered plan as indicated in the screenshot above, you will be prompted to buy your hosting plan (they have many payment options). Choose the one that suits you best.
After payment, you will be prompted to create a password for your new account and before you know your dashboard is ready.
Log Into WordPress Via Hostinger
Another way to access your WordPress dashboard is through Hostinger.
Follow the instructions below:
Login to Hostinger,

Click at Admin Panel,
You will be taken to your WordPress dashboard, although sometimes it might take you to the WordPress login page.
OR
Login in Directly to WordPress
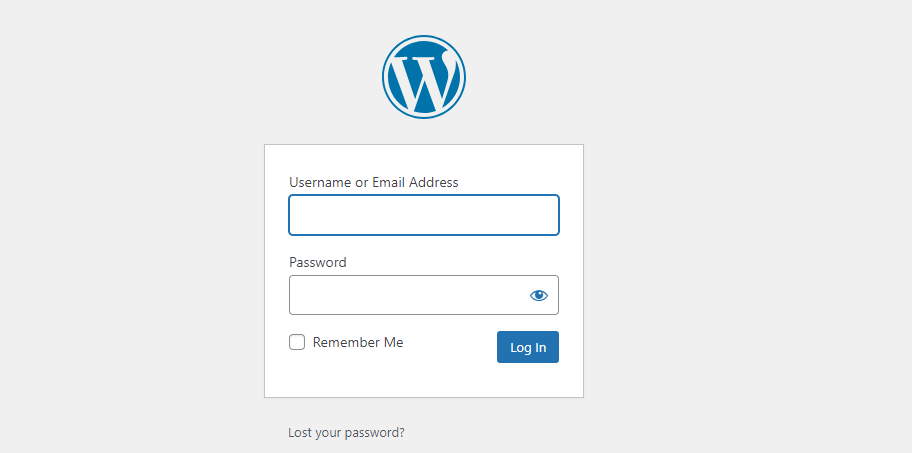
To do this, log in to http://www.yourdomainname.com/wp-admin to bring up the login screen like this (Replace “yourdomainname.com” with your domain name).
E.g https://womenbloggers.club/wp-admin
Go on and use the password and Username/email address that you signed up for your hosting account with.
Most Basic Parts of the WordPress Dashboard
Appearance
Let’s look into the basic subsections under the appearance tab on your WordPress Dashboard.
- Themes
- Customize
- Widgets
- Menus
Themes
You need to change the theme. Click at Themes. Delete all themes installed , but the default, activated theme will not get deleted yet.
Click on the plus sign to add a new theme.
Next, search for a free theme called Kadence (I think it is the best Free Theme)
You can either choose Preview to see a demo of the theme or install it by clicking the Install button once you’re ready.
I suggest Kadence because it offers a wide range of customization options, is lightweight and fast-loading, and provides excellent support and regular updates. It’s also beginner-friendly, making it a great choice for users looking to create a professional website without any coding experience.
Customize
The Customizer function enables you to modify your website’s look and features instantly. For instance, you can adjust colors and choose a background image.
Widgets
Widgets are compact units of specialized functionality that can be positioned within your WordPress sidebars to showcase brief excerpts of content.
You are likely to find default widgets on your sidebars. To remove it, click on that specific widget
Then, Delete
You may add “About me” Widget for now. Locate it under the available widget, drag it to the sider bar.
Click on the widget to open up and fill in your details. It should appear on top of the sidebar.
Menu
WordPress already has a navigation menu that you can use. But if you want to create a custom menu,
- Go to Dashboard > Appearance.
- Click “Menus”
- Name Your Menu.
- Click “Create Menu”
Change Your Permalinks
To change the permalink to post name in WordPress, follow these steps:
- Log in to your WordPress dashboard.
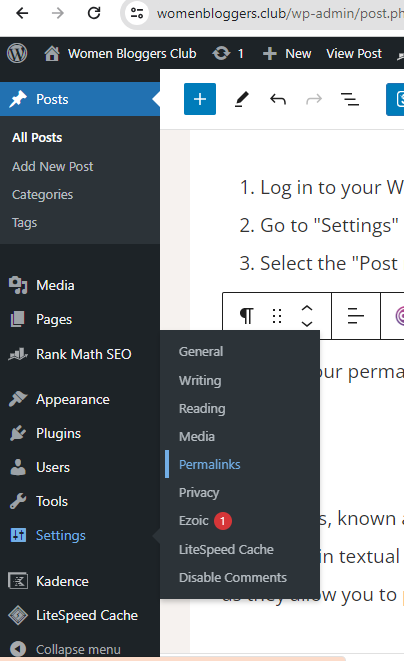
- Go to “Settings” and click on “Permalinks.”
- Select the “Post name” option.
- Save changes.
That’s it! Your permalinks will now be set to the post name format, which is good for search engine optimization(SEO).
Posts
Blog entries, known as posts, are crucial components of your blogging venture, presented in textual form. They serve as the foundation of your blogging business, as they allow you to provide valuable content to your audience.
These entries appear on your blog page in reverse chronological order.
To access your posts, simply click on “All posts” after publishing. This section will display all posts on your blog, whether published or still in draft form.
To create a new post, click on “Add New,” which will direct you to the WordPress editor. Here, you can input the title and body text of your blog post.
Categories
To add categories in WordPress, you can follow these simple steps:
- Log in to your WordPress dashboard.
- Navigate to “Posts” and then “Categories.”
- Enter the name and slug (URL-friendly version) for your new category.
- Optionally, choose a parent category if you want to create a hierarchy.
- Click on the “Add New Category” button to save your changes.
Your category is now created and can be assigned to posts as needed.
Pages
Pages in WordPress are static documents, suitable for content like the about page (details about the author), privacy policy, and contact page as they lack a publish date. They’re ideal for timeless content.
To create a new page, locate the Pages menu in the WordPress Dashboard Navigation and click Add New.
Media
The Media tab resides within the WordPress admin sidebar. This robust feature empowers you to organize and oversee your images, videos, and PDF documents efficiently.
It encompasses comprehensive media details, including alternative text for images, titles, captions, descriptions, URLs, and metadata such as size, type, and upload date.
Note: While filling in information like Alternative Text, Title, and Description is optional, these details play a crucial role in enhancing your media’s visibility on search engines.
For instance, if I were to leave an image with the current filename “cropped-women-bloggers3564-1.png,” it would lack coherence for search engines.
How to Add Images to WordPress Media Library
To access the “Add New Post” page on your WordPress Dashboard, navigate to the Posts section and select Add New.
Next, click on the option labeled “Drop files to Upload/Select Files” to upload media from your computer. This action will direct you to your PC’s media files, where you can select the appropriate media to add it to your WordPress Media library.
To add media directly to your WordPress website, log in and go to Media in the left navigation menu, then choose Add New.
Plugins
Adding plugins to your blog is crucial for enhancing your blogging experience, making it as convenient as can be.
To add a plugin:
Go to “Plugins” in your WordPress dashboard.
Click on Plugins > Add New.
Browse to the plugin archive and select it.
Then click Install Now and the plugin will be installed shortly.
Below are Plugins That I recommend:
Light Cache Speed
For bloggers striving to improve their WordPress website’s performance, Light Cache Speed emerges as an indispensable plugin. By optimizing page loading times, this tool enhances user experience and bolsters SEO rankings. Its streamlined caching mechanisms ensure swift content delivery, keeping visitors engaged and satisfied with seamless browsing experiences.
Rank Math (Free version)
Elevating your blog’s visibility on search engines is crucial, and Rank Math’s free version offers a robust set of SEO tools to accomplish just that. With features like content optimization suggestions, keyword tracking, and rich snippet integration, bloggers can efficiently optimize their posts for higher rankings and increased organic traffic.
Wordfence
Security is paramount for any blogger, and Wordfence stands as a formidable defense against cyber threats. This plugin provides a comprehensive suite of security features, including firewall protection, malware scanning, and login security enhancements. With Wordfence actively safeguarding your WordPress site, you can blog with confidence, knowing your content and data are secure from malicious attacks.
UpdraftPlus
Backing up your blog’s content is essential to protect against data loss, and UpdraftPlus simplifies this process with its reliable backup solutions. This plugin allows bloggers to schedule automated backups of their WordPress site and easily restore data in case of emergencies. With UpdraftPlus, you can rest assured that your valuable content is safe and accessible at all times.
GDPR Cookie Consent
In today’s regulatory landscape, compliance with data protection regulations like GDPR is crucial for bloggers. GDPR Cookie Consent plugin helps in achieving compliance by providing customizable cookie consent banners, allowing visitors to manage their preferences regarding data tracking and usage. By prioritizing user privacy and transparency, bloggers can build trust with their audience and create a more ethical browsing experience.
Google Analytics and Google Search console
It is important to set up your Google Analytics and Google Search Console at the very beginning. This is important for tracking what the people who visit your blog site are doing and optimize accordingly.
Settings
The Settings area is where you can view, edit basic site information of your site.
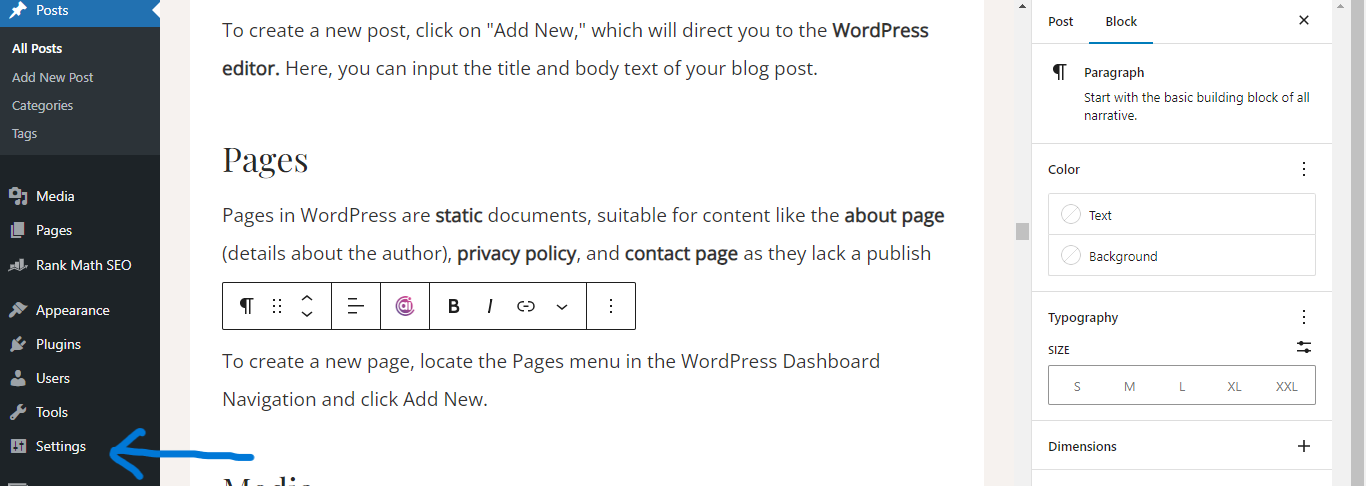
You really don’t need to edit any of these functions right now, except one thing = Permalinks.
Permalinks refer to the format for the URL of your posts.
To change it, follow the instructions below:
Click at settings > Permalinks
By default, Plain under Common settings will be selected. Change this to Post name.
Give Your Site Identity
Click on the little house at the top of your WordPress dashboard to see how your site looks.
You may not be happy with what you see.
Lets’ give your site a unique design, so it can stand out. We can achieve this by uploading a logo, a site title, tagline, icon, and images.
How to Add Logo in WordPress Header
To add a logo to your WordPress header, you typically need to access the “Customizer” from your WordPress dashboard.
From there, navigate to the “Header” section, where you should find an option to upload or select your logo image.
Once uploaded, adjust the settings as needed, and save your changes to see the logo appear in your header.
How to Add Site Title and Tagline in WordPress
To add a site title and tagline in WordPress, navigate to the WordPress dashboard, click on “Settings,” then “General.”
In the General Settings, you’ll find fields to enter your Site Title and Tagline. Once entered, be sure to save your changes.
1. Got to your WordPress Administration dashboard.
Navigate to Appearance on your left sidebar and click on Customize.
3. Depending on your theme, click on General Settings.
4. Then, Site Identity or Site Title and Tagline in the Customizer (Depends on the theme).
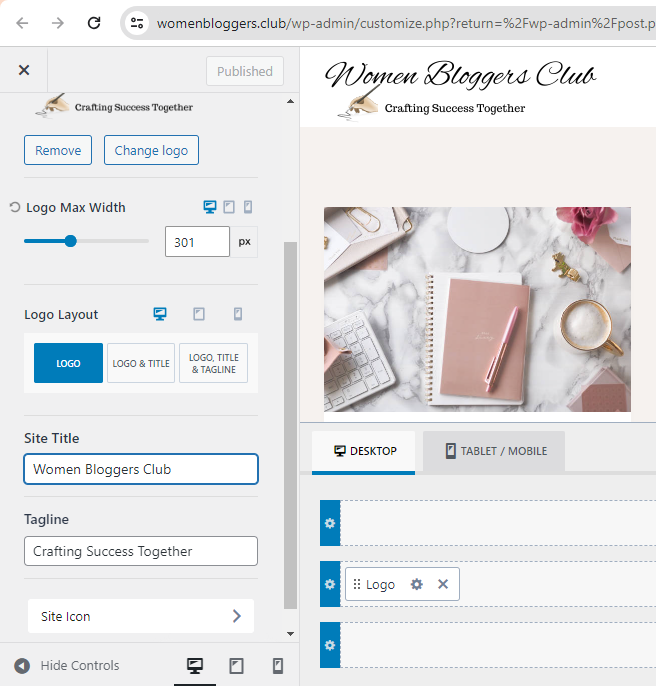
5. Once in the site Identity options, you can change the title, tagline and upload your site icon.
6. Once finished, click Publish to save your changes.
Use Canva (Free tool) to design your site icon.
My site example:
Name: Women Bloggers Club
Tagline: Crafting Success Together (because my goal is to help women attain time, money, and location freedom, doing things they love).
Overall, your tagline should describe what you do (be creative).
Write and Share Your First Blog Post
You have successfully set up your blogging business. Now it is time to write to write valuable content, and share your experience with the world.
Once your first blog post is ready, follow the steps below to share your post with the world:
Step 1: Log in to the WordPress dashboard
Step 2: Navigate to Posts on your left sidebar and click on Add new.
Step 3: Enter the title of your new post
Step 4: Enter body content
Step 5. Choose a category
You can easily add a new category when writing a post. You will be given an option if you click on the categories tab.
Otherwise, go to Posts on your WordPress admin dashboard > Categories. Provide the new category name, slug, description. Try to limit your categories to 7 for now.
Step 6. Upload Featured Image
Frequently Asked Questions
How Long Should Blog Posts Be?
Officially, there isn’t a set minimum length requirement for blog posts. Nevertheless, I advise aiming for a minimum of 300 words to enhance your chances of ranking favourably in search engine results.
Keep in mind, longer posts (1000 words or beyond) generally fare better in terms of ranking compared to shorter ones.
How Can I Promote My Blog?
You cannot simply produce valuable, high-quality content for your blog and expect readers to naturally find their way to your site to consume it. Utilizing blog promotion is essential to drive traffic.
One of the most effective methods to increase traffic to your blog is by leveraging social networks like Pinterest, Facebook, and Instagram. Pinterest, in particular, offers long-lasting benefits as it functions more as a search engine than a typical social media platform. By optimizing your blog posts for Pinterest, you can enhance your visibility in search results, which is favored by Google. This presents an opportunity for your content to be discovered through Google searches.
As organic traffic begins to flow, you can generate income from your blog without any monetary investment. On average, it takes about 3 to 6 months for a new blog to gain traction in search engines, although this timeline can vary depending on the competitiveness of the keywords you’re targeting in your blog posts (with low-competition keywords ranking more easily than high-competition ones).
How Much Do WordPress Boggers Make?
The earnings potential of a blogger hinges on the niche chosen and the level of dedication put into developing their blog business. While some bloggers rake in up to $2000 per month, others may only earn less than $100 monthly, illustrating the multitude of variables at play.
Nonetheless, even beginners can monetize their blogs. Once your blog is established, you can explore various strategies to generate income from it.
How Do Beginner Bloggers Make Money?
Beginner bloggers have several avenues to explore when it comes to monetizing their blogs. One common method is through affiliate marketing, where bloggers promote products or services and earn a commission for every sale made through their referral links. This requires building trust with your audience and strategically incorporating affiliate links into your content.
Another way for beginner bloggers to make money is through display advertising, such as Google AdSense and Ezoic. By displaying ads on their blog, bloggers can earn revenue based on the number of clicks or impressions the ads receive. However, it’s essential to strike a balance between ads and user experience to avoid overwhelming visitors and maintain engagement on the site.
As beginners gain experience and grow their audience, they can explore additional monetization strategies like sponsored content, digital product sales, or offering consulting services related to their blog niche.
Consider Top Affiliate Network/ Market Places Such as:
JVZOO – This does not require approval and you can get high commissions (Internet Marketing Niches only)
Amazon – Has earned the trust of many shoppers worldwide.
ClickBank – Offers high commissions to affiliates and has earned trust.
How Do I Get Paid from Affiliate Marketing?
There exist various methods for receiving payments in affiliate marketing. Irrespective of the affiliate network chosen, it’s highly likely that payments are facilitated through PayPal or Bank Wire transfer.
Setting up a PayPal account incurs no charges, and there are no maintenance fees. However, it’s plausible that your country may not be supported by PayPal for receiving money.
In such instances, your only recourse is to opt for Bank Wire transfer directly into your bank account. This avenue can prove costly due to potential hidden fees, which may reach up to 5%, particularly if your currency differs from that of the merchant.
However, there is a solution to this issue:
You can use TransferWise. Transfer Wise (or Now Wise) is perhaps the best online bank/transfer service I have ever come across.
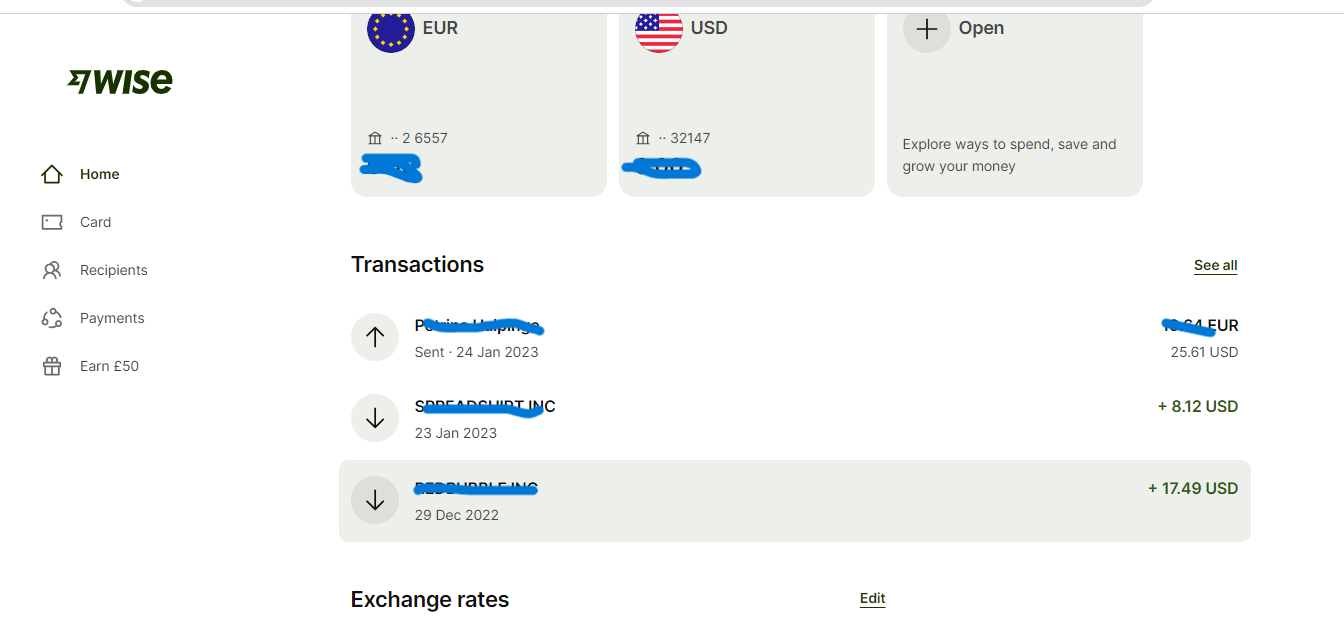
It is likely to be 8x cheaper thank banks.
That is it from me! Happy Blogging


